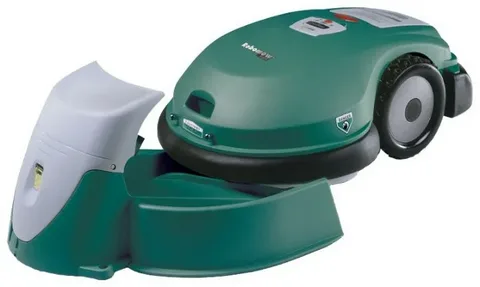
Automatic lawn mowers have revolutionized the way we maintain our lawns, offering convenience and efficiency. One critical aspect of using these smart devices effectively is the proper setup of boundary wires. This guide will walk you through the essentials of a Do-It-Yourself Boundary Wire Setup for automatic lawn mower, ensuring your mower operates smoothly and safely.
What is a Boundary Wire and Why is it Important?
A boundary wire is a physical wire laid around the perimeter of your lawn or garden area. It acts as an invisible fence that tells the automatic lawn mower where to mow and where to stop. Without this boundary, the mower would wander off or miss certain areas, making it an essential component for optimal performance.
Setting up the boundary wire yourself can save you money and give you control over the mower’s operating area, tailoring it to your specific lawn layout.
Tools and Materials Needed for Do-It-Yourself Boundary Wire Setup
Before you begin your Do-It-Yourself Boundary Wire Setup for Automatic Lawn Mowers, gather the necessary tools and materials:
- Boundary wire (usually provided by the mower manufacturer)
- Wire stakes or pegs
- Wire cutters or scissors
- Measuring tape
- Hammer or mallet (for stakes)
- Optional: boundary wire connector clips
Having everything ready will make the setup process quicker and more efficient.
Step-by-Step Guide to Installing Your Boundary Wire
1. Plan Your Lawn Area
Walk around your lawn and decide the exact areas you want your mower to cover. Mark these areas roughly with flags or spray paint for guidance.
2. Lay Out the Boundary Wire
Start at the charging station (where the mower docks) and unroll the boundary wire along the edges of the lawn. Keep the wire about 6 inches away from any obstacles like flower beds, trees, or pathways to prevent mower damage.
3. Secure the Wire with Stakes
Use wire stakes to pin the boundary wire firmly into the ground. This keeps the wire from shifting, especially after rain or lawn activities.
4. Connect the Wire to the Charging Station
Most automatic lawn mowers require the boundary wire to be connected to the charging station to complete the circuit. Follow your mower’s manual for specific instructions on wiring connections.
5. Test Your Setup
Once the wire is installed and connected, power on your mower and observe its movement. Make adjustments if it crosses the boundary or misses sections.
Tips for a Successful Do-It-Yourself Boundary Wire Setup
- Avoid sharp bends in the wire to prevent damage.
- Keep the wire tight but not overly stretched.
- If you have large obstacles or separate lawn sections, consider creating island boundaries.
- Regularly check for wire damage, especially after heavy weather or lawn maintenance.
Conclusion
A Do-It-Yourself Boundary Wire Setup for Automatic Lawn Mowers can be a rewarding project that ensures your robotic mower efficiently and safely maintains your lawn. By following these simple steps and tips, you can enjoy a perfectly trimmed lawn without the hassle of manual mowing. Take control of your lawn care with a DIY boundary wire setup and maximize your mower’s potential.


